1. Project’s management and documentation#
This week I worked on using CLI, visual studio code, git, my computer’s terminal…so that i could document my progression and how i achieved to change my page on the site.
I’ve had a lot of ICT classes so I knew how to use visual studio code but I had never used git which made things a little bit difficult but I had a lot of fun understanding how to use it to modify my page.
Documentation#
As we learned in class, there is a need to document the whole process otherwise we will forget some parts of it.
The forgetting curve published by Ebbinghaus shows perfectly how our memory works:
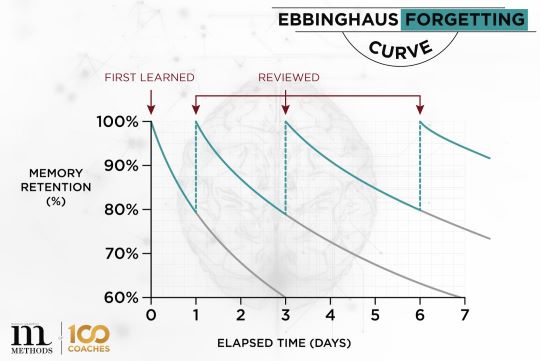
By documenting the process, we are going to be able to explain how we got to the final result and maybe help each-other if someone is stuck at some point or has the same problem that I may have encountered during the process.
It will also remind me of the steps I took which’s going to be a helpful tool.
I’m using a lot of differents things to modify my website but the major ones are:
1. Gitlab Install
2. Visual studio code install
3. GitBash install
4. Windows powershell (to get in touch with my computer’s terminal)
SSH-key#
That’s where I got a little bit lost during the class…
I had no idea what a SSH-key which made things a little bit harder!
But i was able to get through and i’m going to explain step-by-step what I did so that no one does the same mistakes.
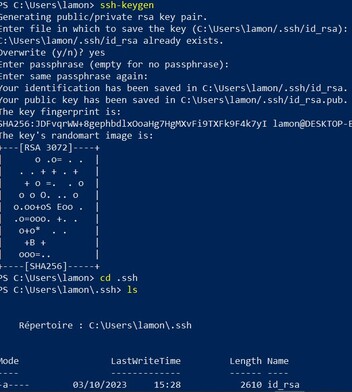
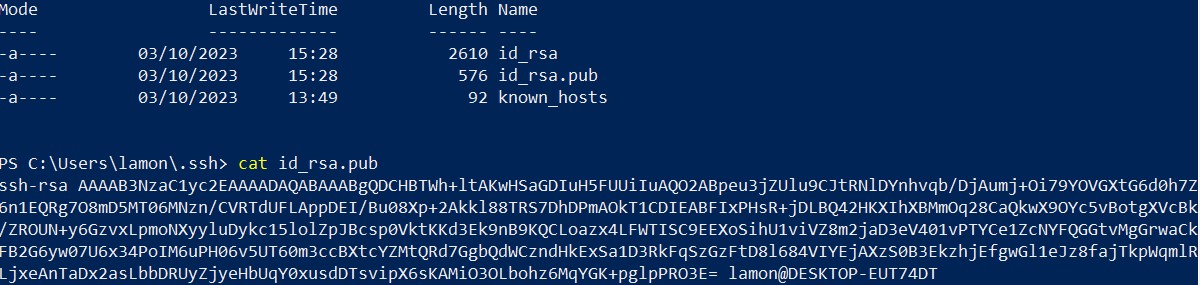
By typing all those codes on my windows powershell, i was able to get my public key.
Then i went on my profile in Gitlab, and I pasted it on my preferences sheet.
By doing this, i was able to create a connection with the site.
I had some troubles to clone the key but this video helped me so much ssh-keygen
Connect Visual Studio Code to GitLab#
After that, I had to clone my key and I put it on visual studio code by writing:
git clone "git@gitlab.com:fablab-ulb/enseignements/2023-2024/fabzero-experiments/students/camille.lamon.git"
The last thing I had to do was to connect git to my gitlab account so I went on gib and I wrote:
git config --global user.name "Camille.Lamon"
git config --global user.email "my email"
I don’t know why but the first time I did it, it didn’t got through.
So to make sure your email and username are in Git’s data, you can write:
git config --list
How to pull and push#
In visual studio code it’s actually really easy to upload the files on the site.
First you need to save you file then you go on source control and you commit
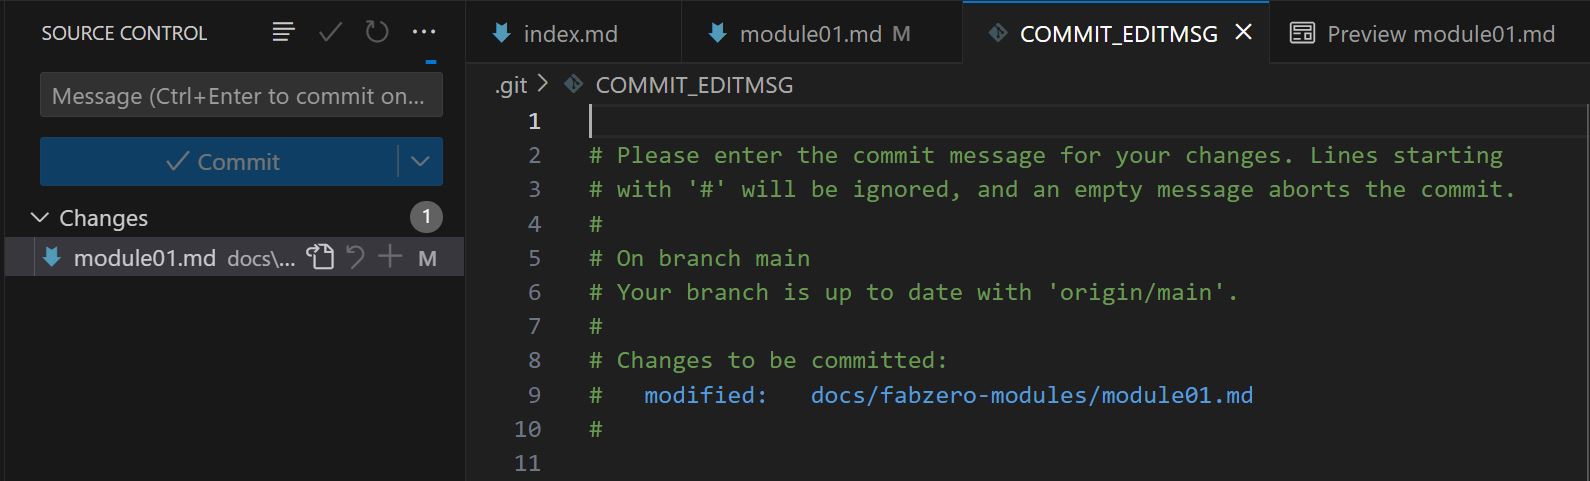
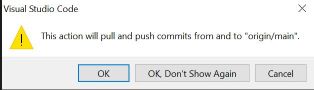
VSC will automatically pull and push for you so you don’t have to write all the usual lines
Markdown#
When you write a site, you can either choose to use HTML or Markdown
Markdown is way more intuitive so that’s the one I mainly chose :))
Here are some useful Markdown syntax:
| Command | Description |
|---|---|
#Title |
#Title |
##Subtitle |
##Subtitle |
_bold_ |
bold |
*Italics* |
Italics |
[title](link) |
insert a link |
 |
insert a image |
<span style="color:green">*color*</span> |
add color |
| `` | code |
~~yeehaww.~~ |
strikethrough |
How to add an image#
To insert an image on your site, you first need to store it in your images finder in docs under your name.
So for me it’s in (CAMILLE.LAMON(docs(images)))
There are differents formats you can use but I’ll rather used JPEG than PNG because i find it much easier and in this course it’s okay to have images who lose a bit of precision when you compress them.
There are different ways to compress an image but I usually just use the tool gimp and I followed this tutorial
If you want to, you can also use online sites to decrease the number of pixels on your image, I used this site resize and it worked really well + it’s free
What I learned and how I’m going to use it in my daily life#
I learned a lot on this module!
First I learned that I really loved informatics and making a site was so fun!!
It’s going to be really useful for me if I ever need again to make a website for whatever reason, I will already have the basics in my head
I also learned what a SSH key is and how to use it.
Also I’d had never used my computer’s terminal in my life so that was new for me :))
Methods of course management#
To be fair, this course takes a lot of time and if i could give you an advice to maintain the workload, it would be to make weekly documentation.
That’s what I did and it helped me not falling behind!
Every week i tried to finish the module that was assigned so there were some quiet weeks which didn’t take too much time and there were also BIG weeks where I had to code + 3D print + make adjustments…
Even if I hadn’t finished the module, i still made my documentation otherwise the next week would have been horrible and that’s not the point of this course.
Checklist#
Sooooo, let’s check I’ve done everything I was supposed to for this week
- Made a website and described how I did it
- Introduced myself
- Documented my steps for uploading files to the archive
- Documented my steps for compressing images
- Documented how I'm going to use project management principles
- Pushed everything to the class archive